.RU
🆕 Create
🔄 Push transfer in from existing NIC-D account with RU-Center
🔁 Transfer in from other registrars than RU-Center
♻️ Renew
🕒 Restore
📤 Transfer out to another registrar than RU-Center
📤 Push transfer out to another NIC-D account with RU-Center
📤 Transfer out Legacy .RU domains
🚮 Delete
🪪 RU-Center Identity agreement process
🪪 ESIA identification (Gosuslugi)
🇷🇺 TLD characteristics
👤 Contact requirements
🆕 Create
.RU domains are prone to registry checks. ID documents or company registration documents may be requested by the registry at any given point in time to verify registrant identity.
- 1
-
Create a contact with the registrant contact data in it. For a detailed description on how to create a contact, See the ➤ Create a new contact KB-article.
ℹ️ If you already have an existing registrant contact that you want to use, you can skip this step and continue with step 2.
- 2
-
Add the required .RU contact properties to the registrant contact. For a detailed description on adding contact properties, See ⚙️ Contact properties.
ℹ️ If the contact properties are already present, you can skip this step and continue with step 3. - 3
- Request the create through our portal. For a detailed description on how to request a create, See the ➤ Create domain(s) KB-article.
- 4
- Once requested, the create will be completed real-time.
🔄 Push transfer from existing RU-Center NIC-D account
.RU domains are prone to registry checks. ID documents or company registration documents may be requested by the registry at any given point in time to verify registrant identity.
‼️ Important
A push transfer from an existing RU-Center NIC-D account can only be done if the new NIC-D account created through our systems has exactly the same registrant data as the current NIC-D account it is registered with.
- 1
-
Create a contact with the registrant contact data in it. For a detailed description on how to create a contact, See the ➤ Create a new contact KB-article.
ℹ️ If you already have an existing registrant contact that you want to use, you can skip this step and continue with step 2.
- 2
-
Add the required .RU contact properties to the registrant contact. For a detailed description on adding contact properties, See ⚙️ Contact properties.
ℹ️ If the contact properties are already present, you can skip this step and continue with step 3. - 3
- Send an email to support@realtimeregister.com and ask our support team to start a transfer for the domain using the newly created registrant contact.
- 4
-
Our support team will create a new NIC-D account based on the newly created contact and will reply with the receiving NIC-D account number.
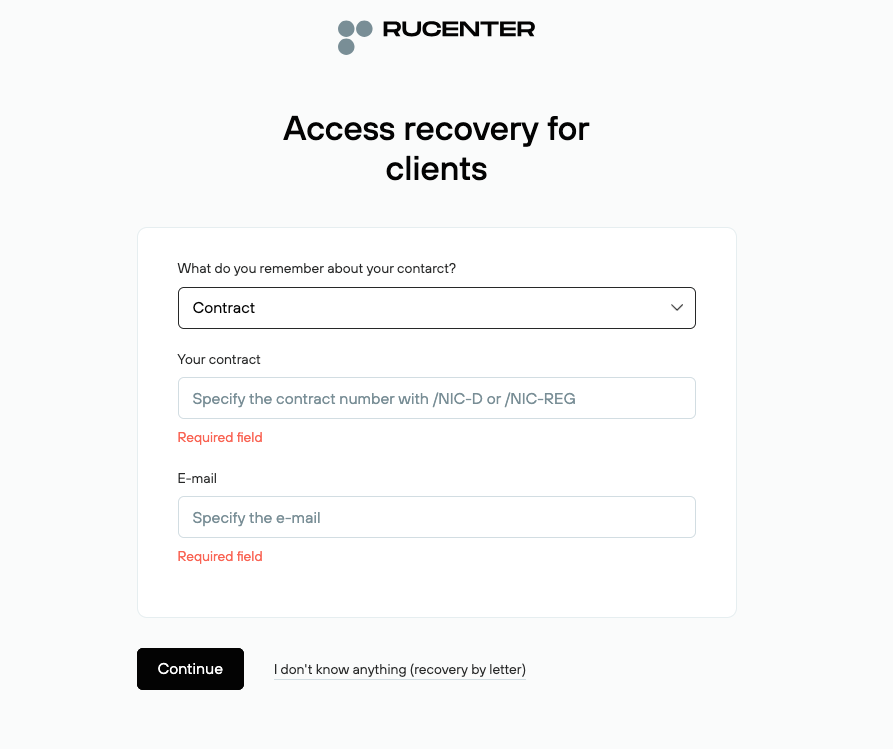
ℹ️ Have the receiving NIC-D account holder perform a password reset with the Remind login details option available on the RU-Center login page (https://www.nic.ru/en/auth/login/). To perform the password reset provide the receiving NIC-D account number in 123456/NICD format + the email address listed for the NIC-D number the password reset is requested for.
- 5
-
Once you have received the receiving NIC-D account number, have the registrant push the domain from the losing NIC-D account to the receiving NIC-D account.
⚠️ Complete the below steps in the current NIC-D account managed by the losing registrar.
- Have the registrant log in (https://www.nic.ru/en/auth/login/) to the NIC-D account that is managed by the losing registrar.

- Click Operations → Domain transfer.
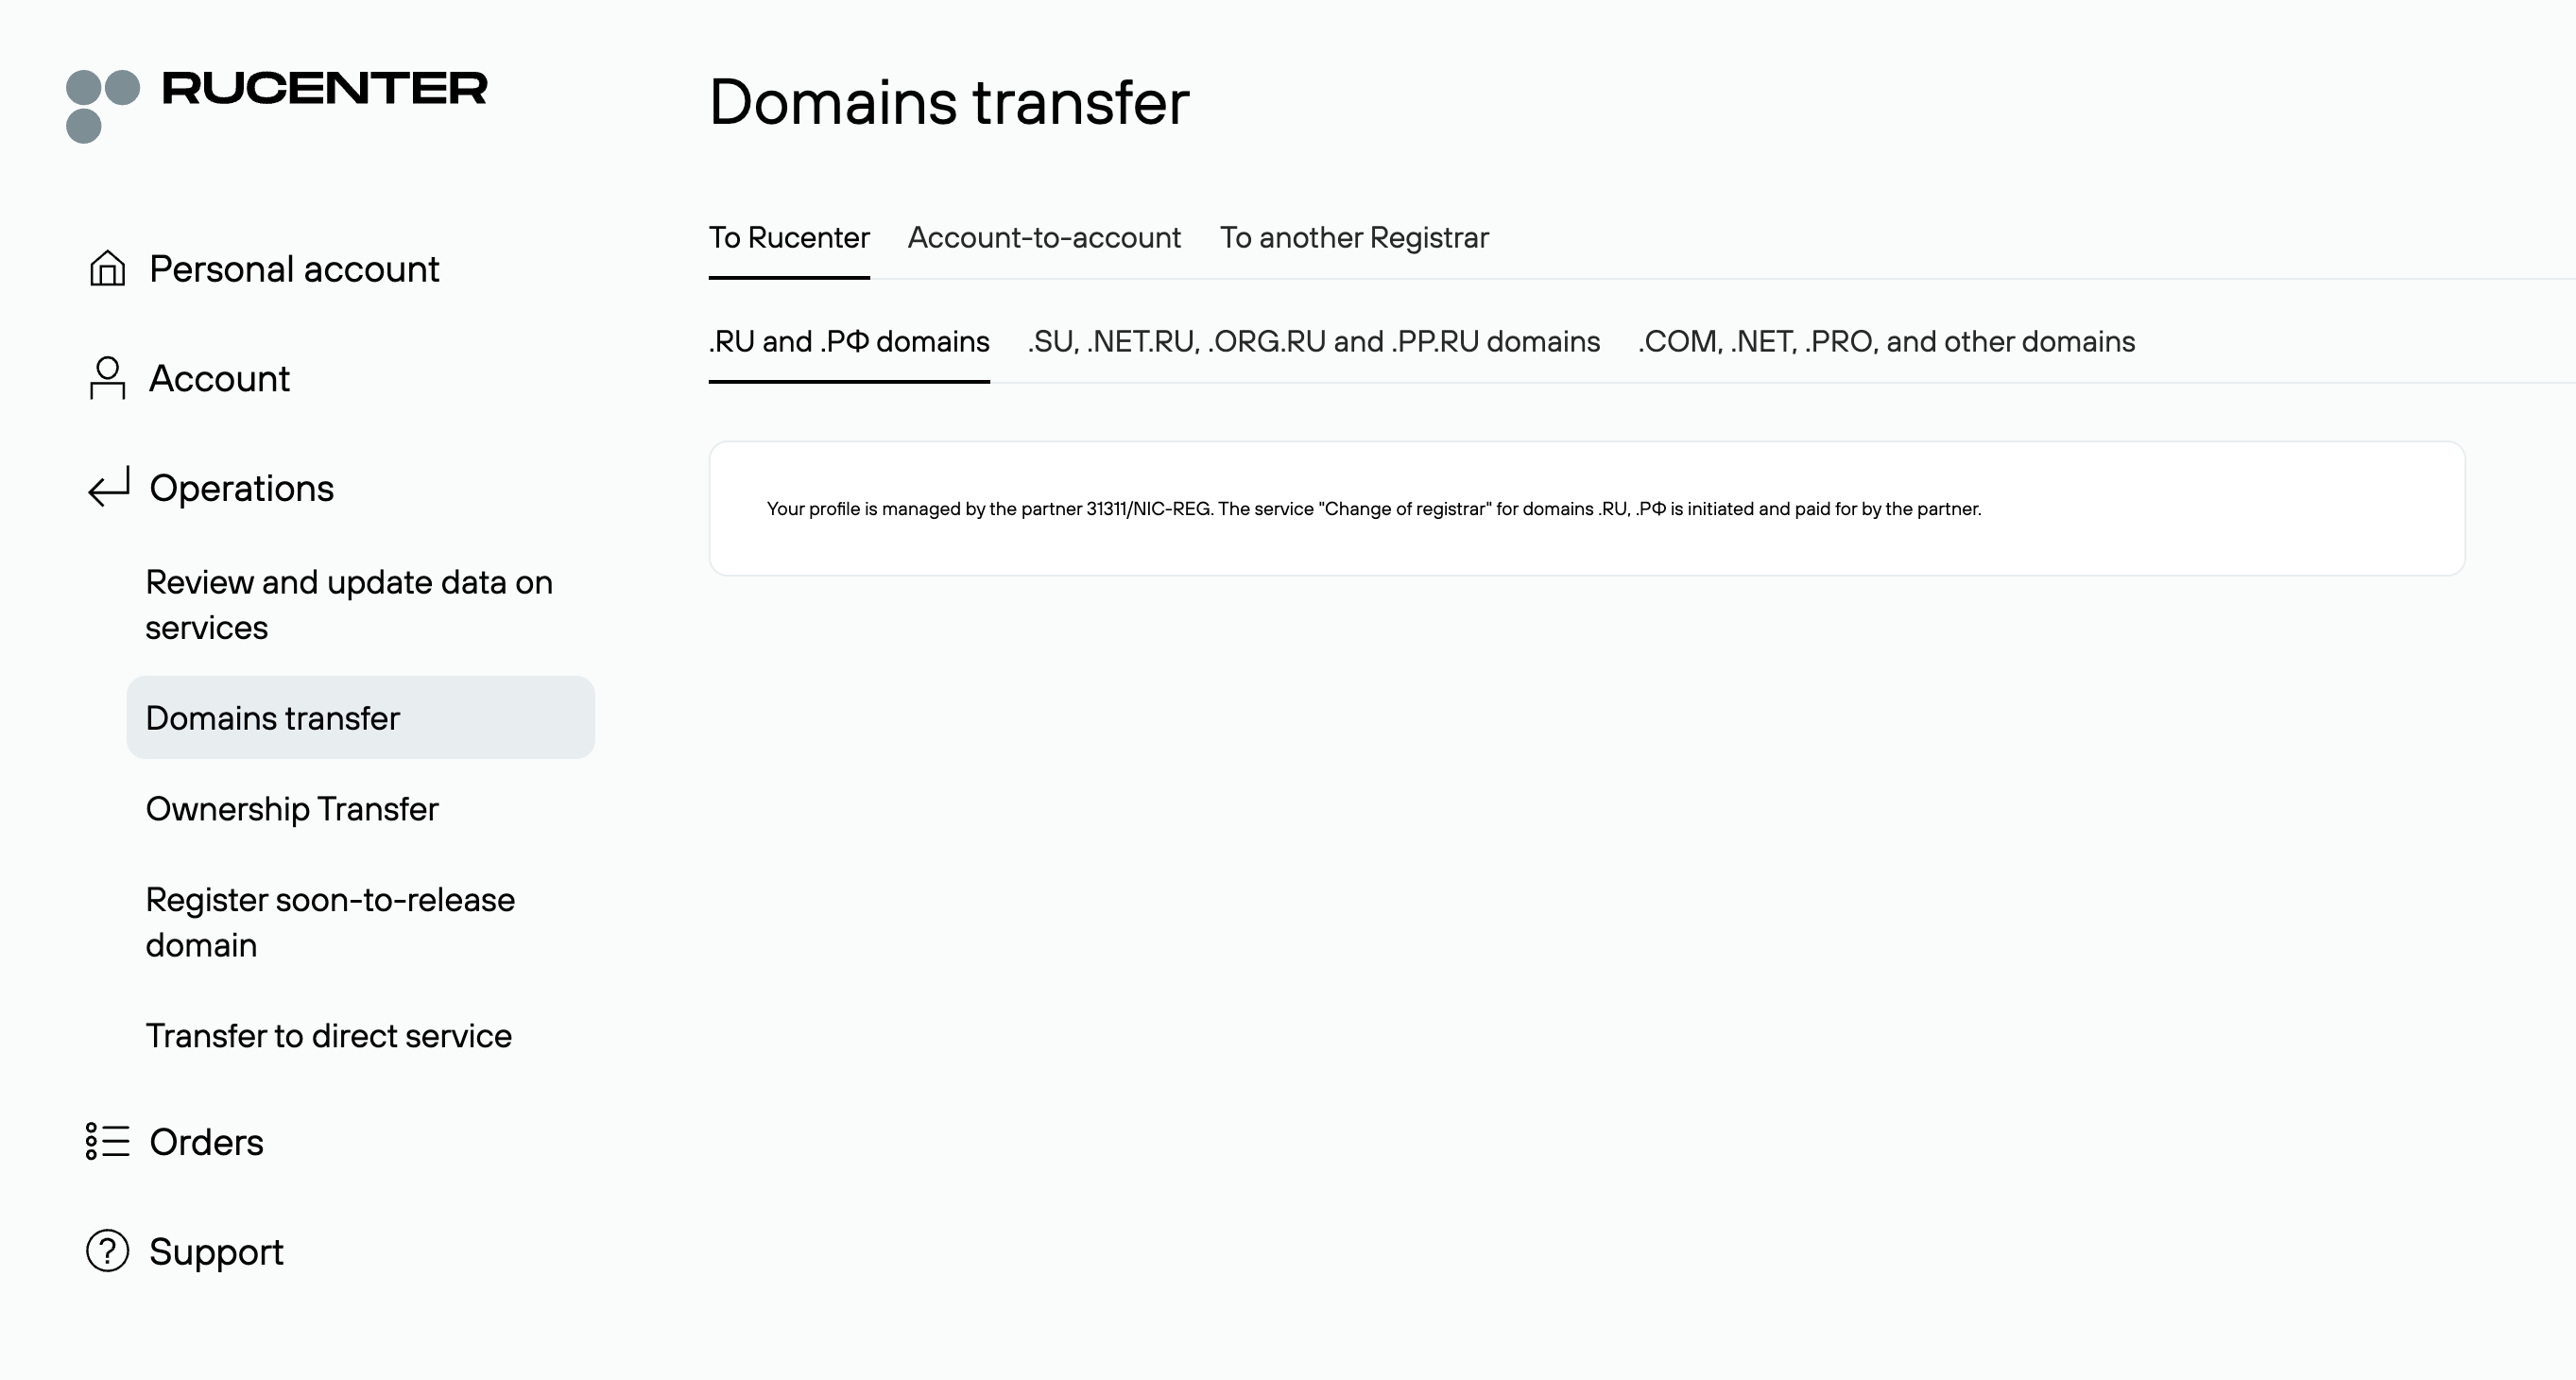
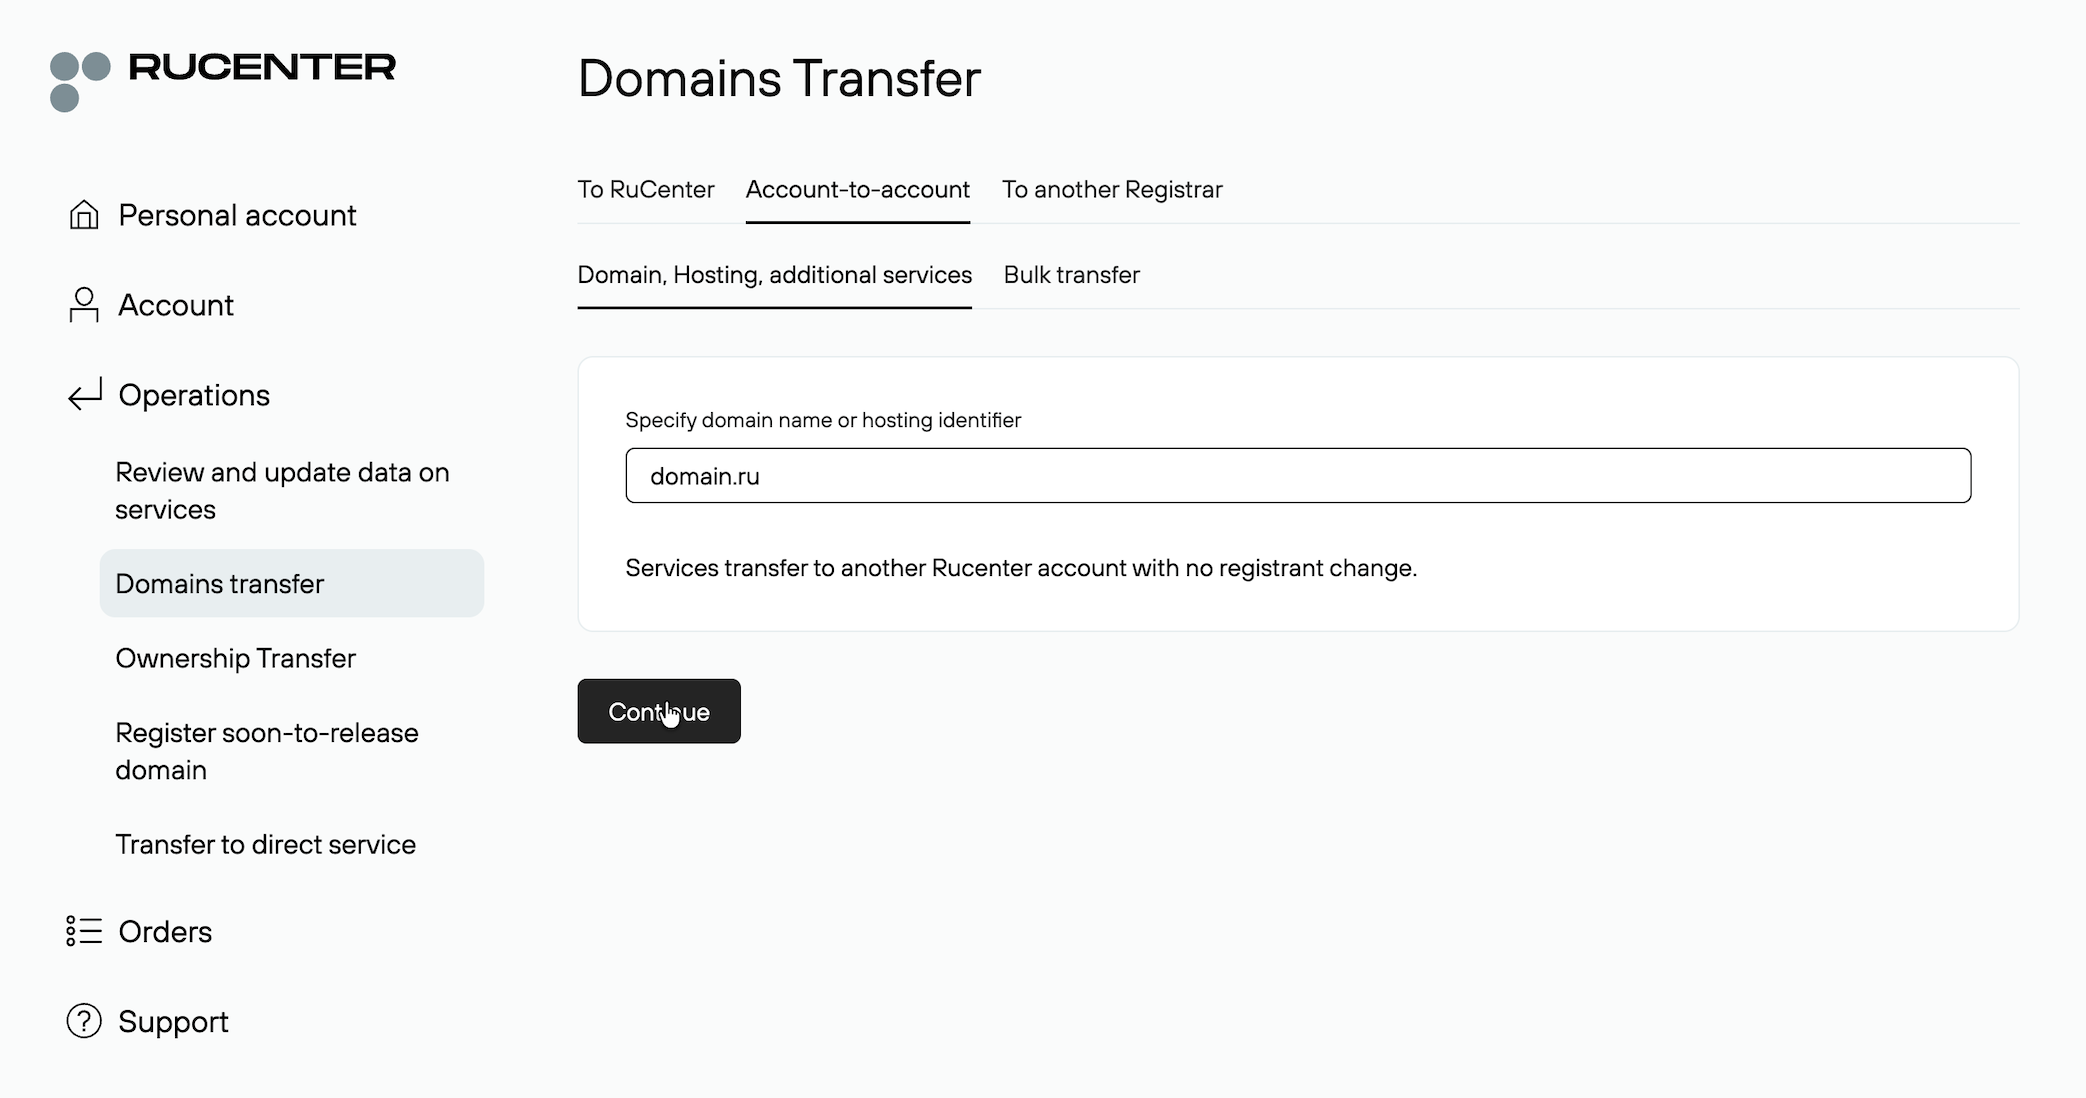
- Select the Account-to-account option.

- Enter the domain to be pushed to the receiving NIC-D account and click Continue.
- In the New registrant contact field, enter the receiving NIC-D account number you received from our support team.

- In the Administrative password field, enter the administrative password of the new NIC-D account.

- Click Transfer to execute the push to the receiving NIC-D account.
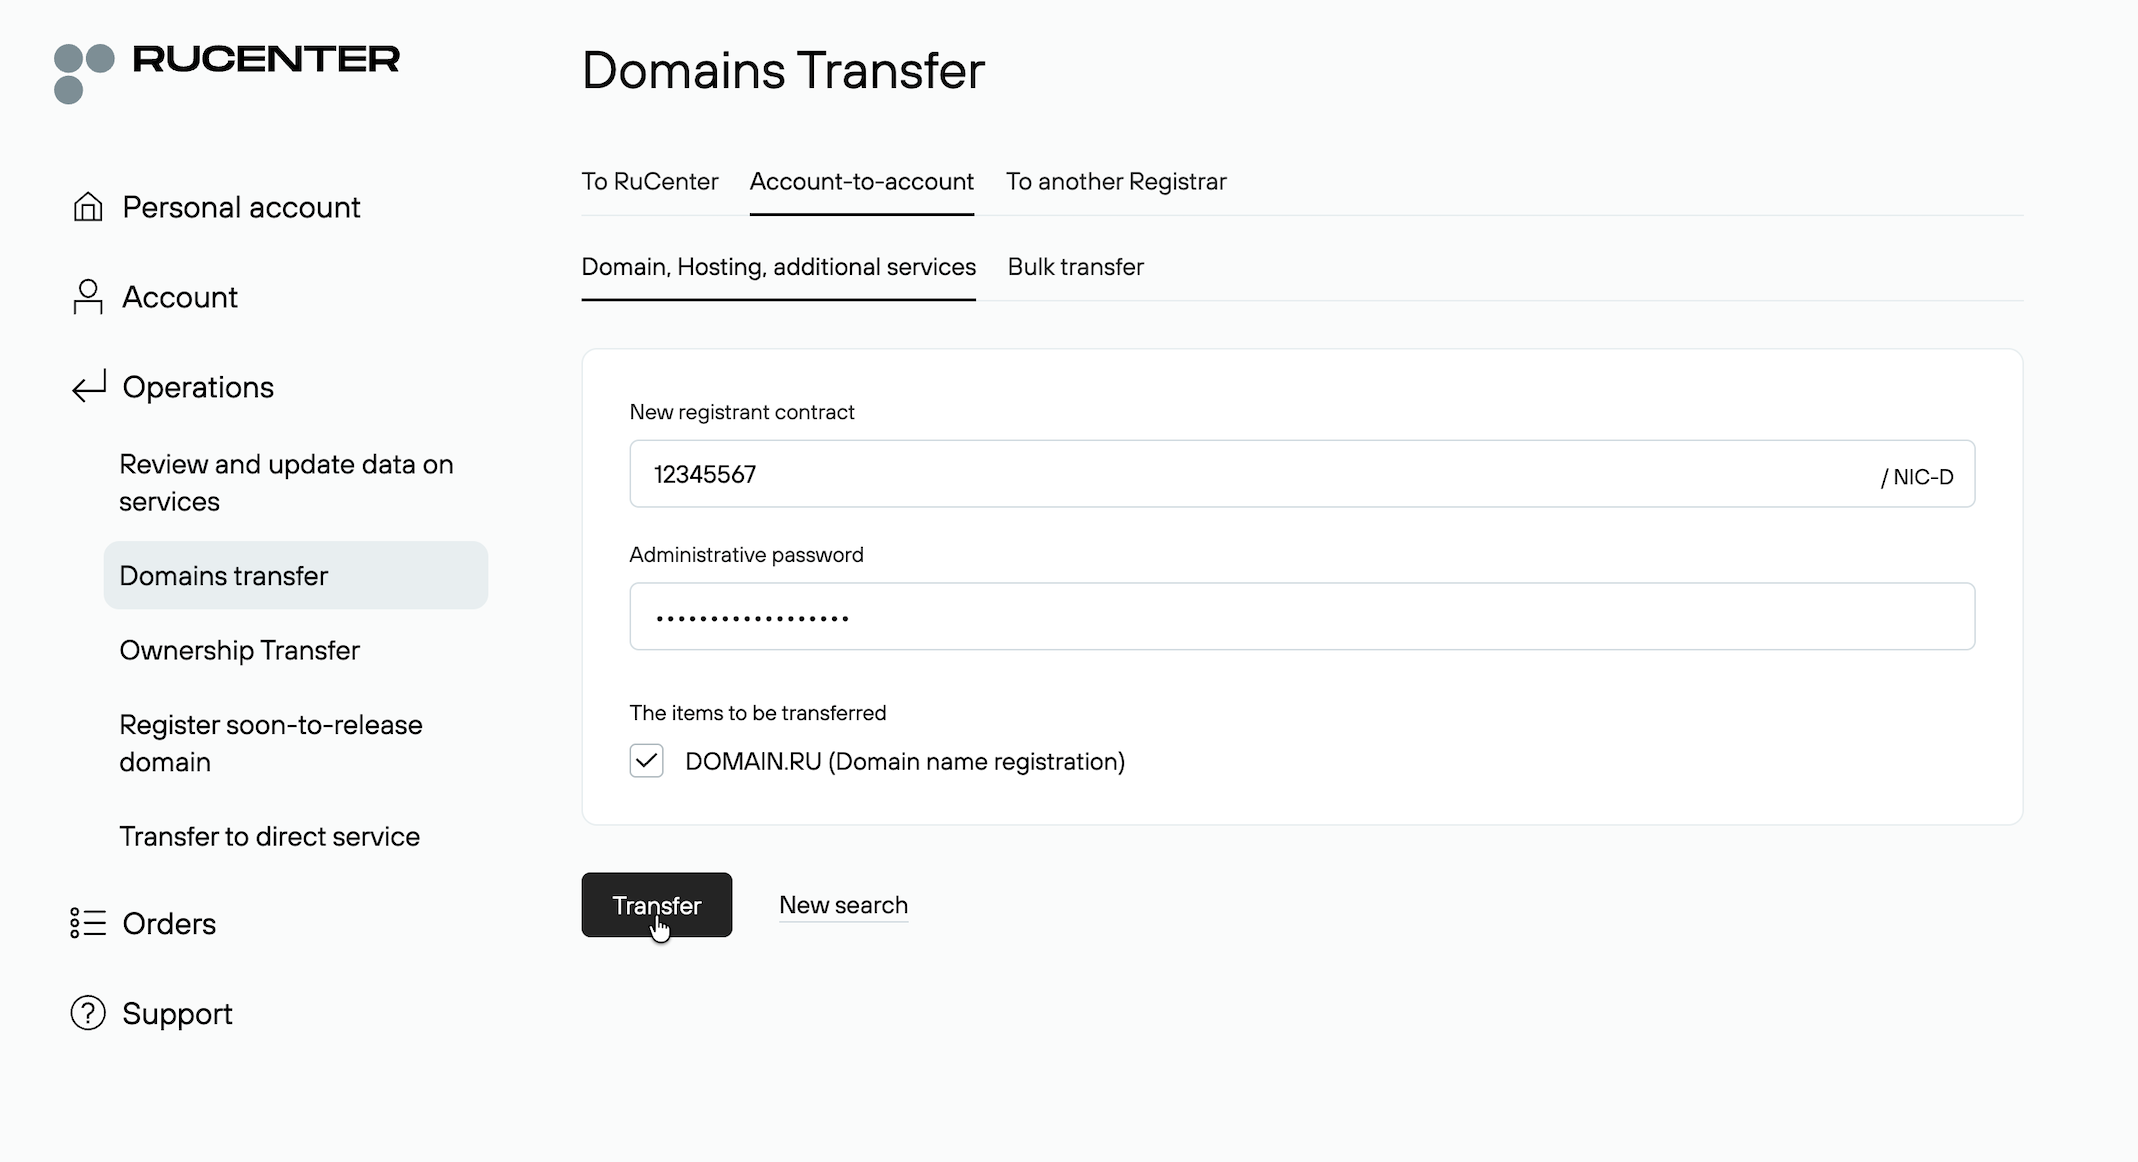
- A message indicating the transfer was successful will be displayed.
ℹ️ Errors might occur after confirming the push transfer. For more information, see ➤ Known errors.
- Have the registrant log in (https://www.nic.ru/en/auth/login/) to the NIC-D account that is managed by the losing registrar.
- 6
- It can take up to 48 hours for the push to complete. Once completed, the domain will be visible in the receiving NIC-D account: https://www.nic.ru/en/manager/.


- 7
-
If a push transfer takes longer than 48 hours, have the receiving NIC-D account holder contact RU-Center through a support ticket and ask why the transfer has not been completed yet. A support ticket can be created through the Support option in the left hand menu whilst logged in to any NIC-D account.
ℹ️ If RU-Center does not reply in a reasonable timeframe and the transfer still does not complete, (our reseller can) contact support@realtimeregister.com for more information.

- 8
- Once the push transfer has been completed at RU-Center, contact support@realtimeregister again in a reply to the existing email thread about the push transfer. Ask our support staff to sync the transferred domain into your account. Once that's done, you can manage the domain through your Realtime Register account.
Known errors


🔁 Transfer in from other registrars than RU-Center
.RU domains are prone to registry checks. ID documents or company registration documents may be requested by the registry at any given point in time to verify registrant identity.
- 1
-
Create a contact with the registrant contact data in it. For a detailed description on how to create a contact, See the ➤ Create a new contact KB-article.
ℹ️ If you already have an existing registrant contact that you want to use, you can skip this step and continue with step 2
- 2
-
Add the required .RU contact properties to the registrant contact. For a detailed description on adding contact properties, See ⚙️ Contact properties.
ℹ️ If the contact properties are already present, you can skip this step and continue with step 3. - 3
- Request the transfer through our portal. For a detailed description on how to request a transfer, See the ➤ Transfer domain(s) KB-article.
- 4
-
Once the transfer is requested at registry level an FOA (Form Of Authorisation) is sent to the registrant email address:
- FOA accepted
✅ Transfer completes instantly. - FOA rejected
❌ Transfer fails instantly. - FOA ignored
❌ Transfer fails after 5 days.
- FOA accepted
- 5
- Once the FOA has been accepted, the transfer will complete real-time.
♻️ Renew
- To request a renewal, follow the instructions in the ➤ Renew domains KB-article.
🕒 Restore
- To request a restore, follow the instructions in the ➤ Restore domain KB-article.
🔄 Registrant change
.RU domains are prone to registry checks. ID documents or company registration documents may be requested by the registry at any given point in time to verify registrant identity.
- 1
-
Create a contact with the registrant contact data in it. For a detailed description on how to create a contact, See the ➤ Create a new contact KB-article.
ℹ️ If you already have an existing registrant contact that you want to use for this registrant change, you can skip this step and continue with step 2.
- 2
-
Add the required .RU contact properties to the registrant contact. For a detailed description on adding contact properties, See ⚙️ Contact properties.
ℹ️ If the contact properties are already present, you can skip this step and continue with step 3. - 3
-
Send an email to support@realtimeregister.com and request the registrant change.
⚠️ Provide the created contact handle(s) + the domain(s) you wish to perform a registrant change for through email.
- 4
-
Our support department will provide the required steps to process change the registrant in a reply to your email.
⚠️ In some cases, a transfer from our legacy partner to our new RU partner is required to complete a registrant change.
📤 Transfer out to another registrar than RU-Center
Authcodes can only be retrieved by the registrant. They'll have to log in to their NIC-D account with RU-Center, provide documents to verify registrant identity and request the authcode through the procedure below.
- 1
-
To request a transfer to another registrar, an authcode is required and can be requested by the registrant directly through their NIC-D account through the procedure below.
⚠️ Without the identity agreement process completed, authcodes cannot be provided to the registrant email address.
- Have the registrant log in (https://www.nic.ru/en/auth/login/) to the NIC-D account.
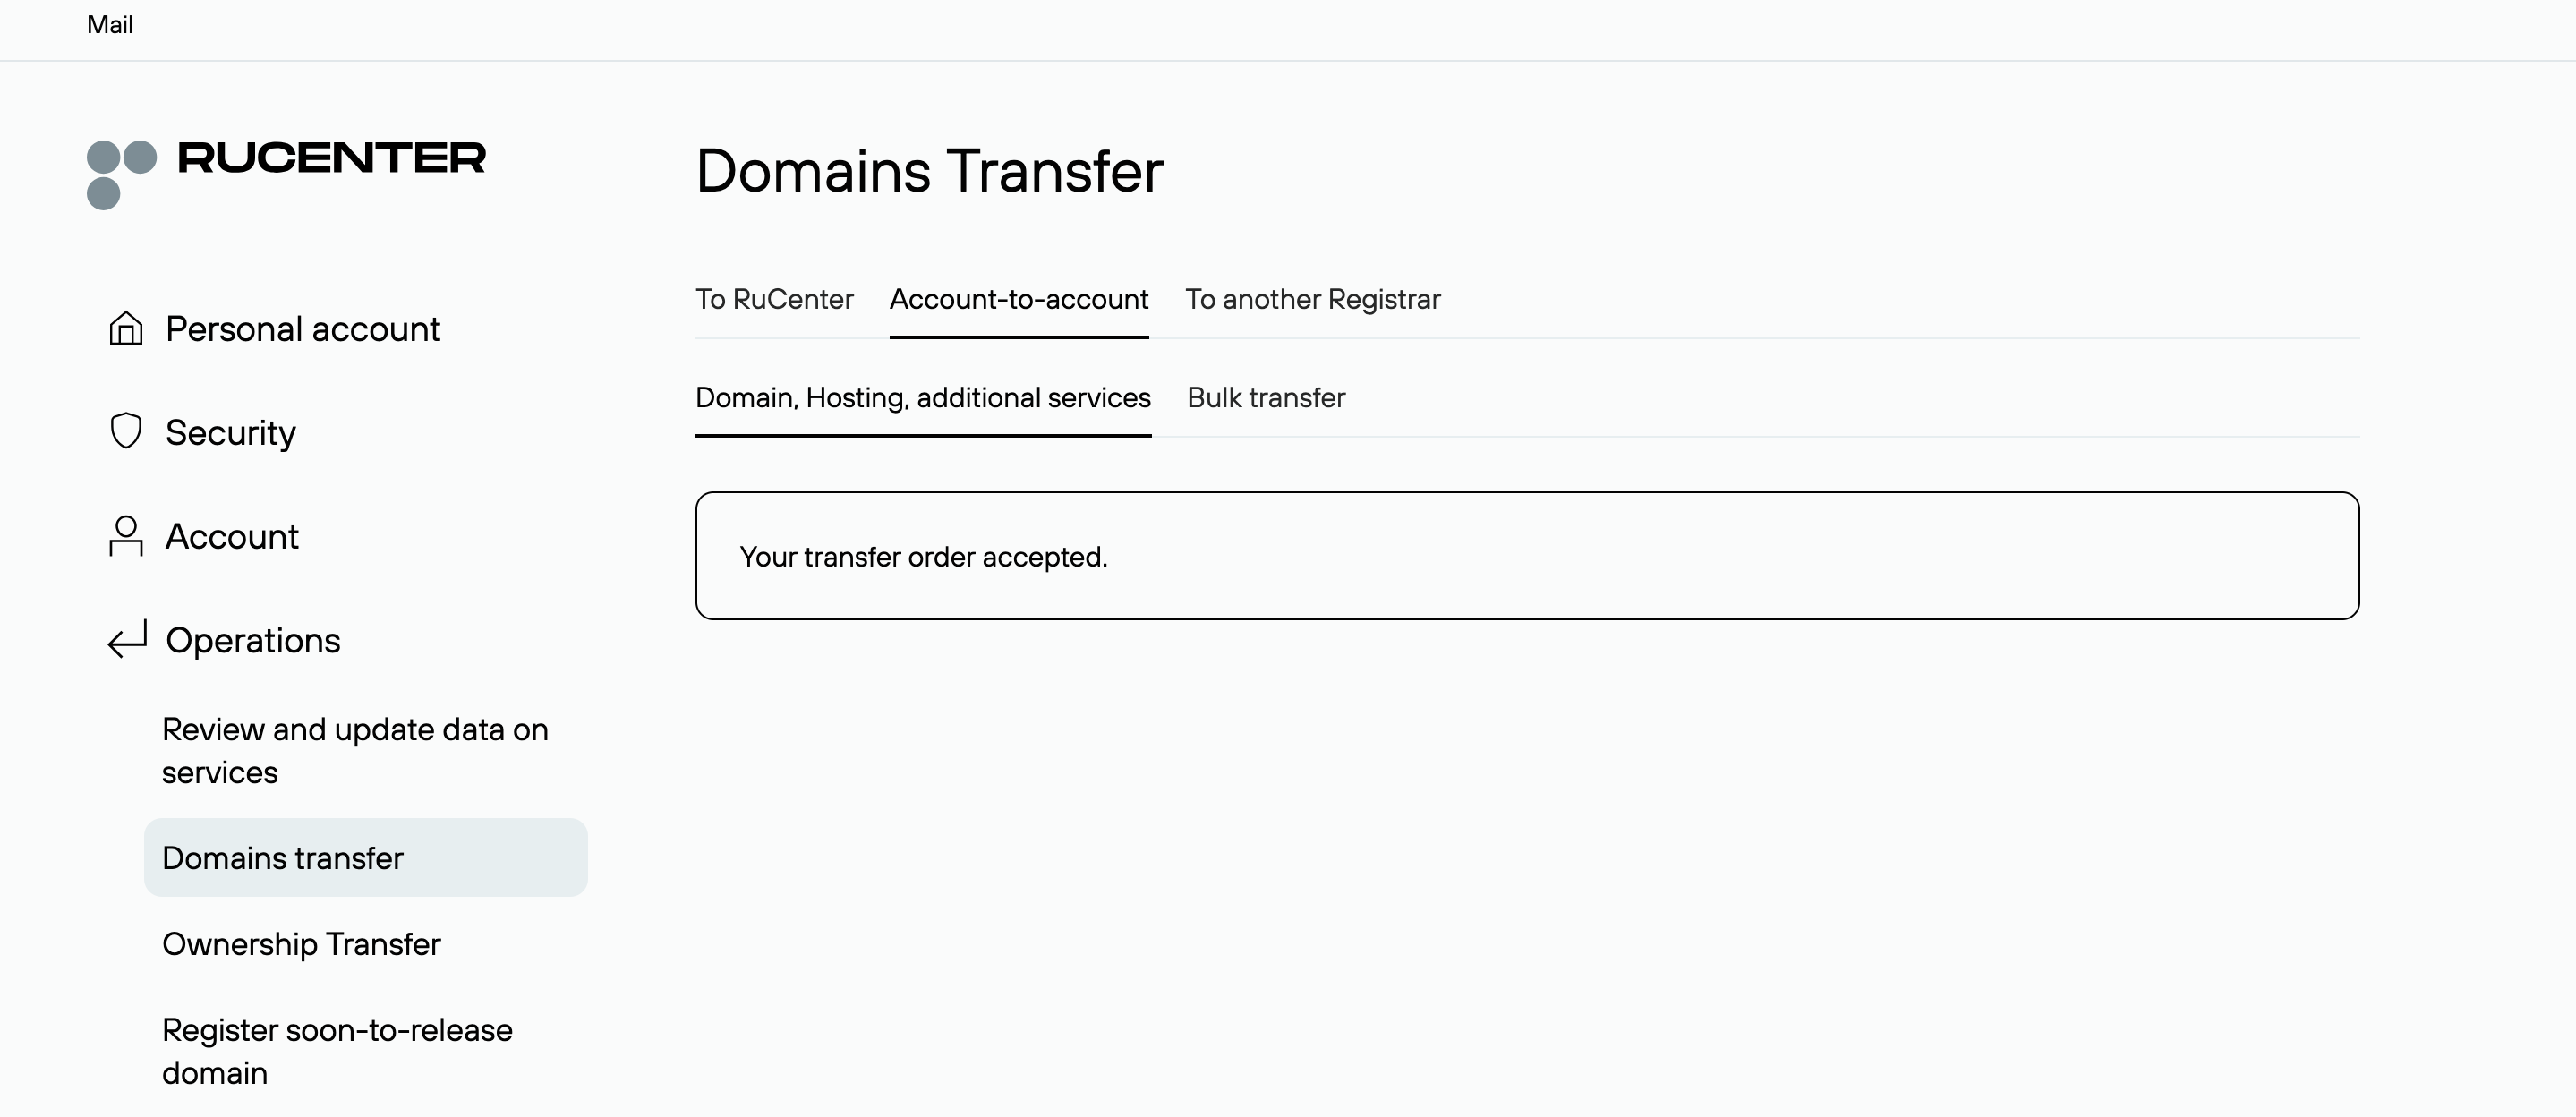
- Click Operations → Domain transfer.
- Select the Another registrar option.
 If required, complete the agreement identification process first.
- Select the contact data (email address & phone number).

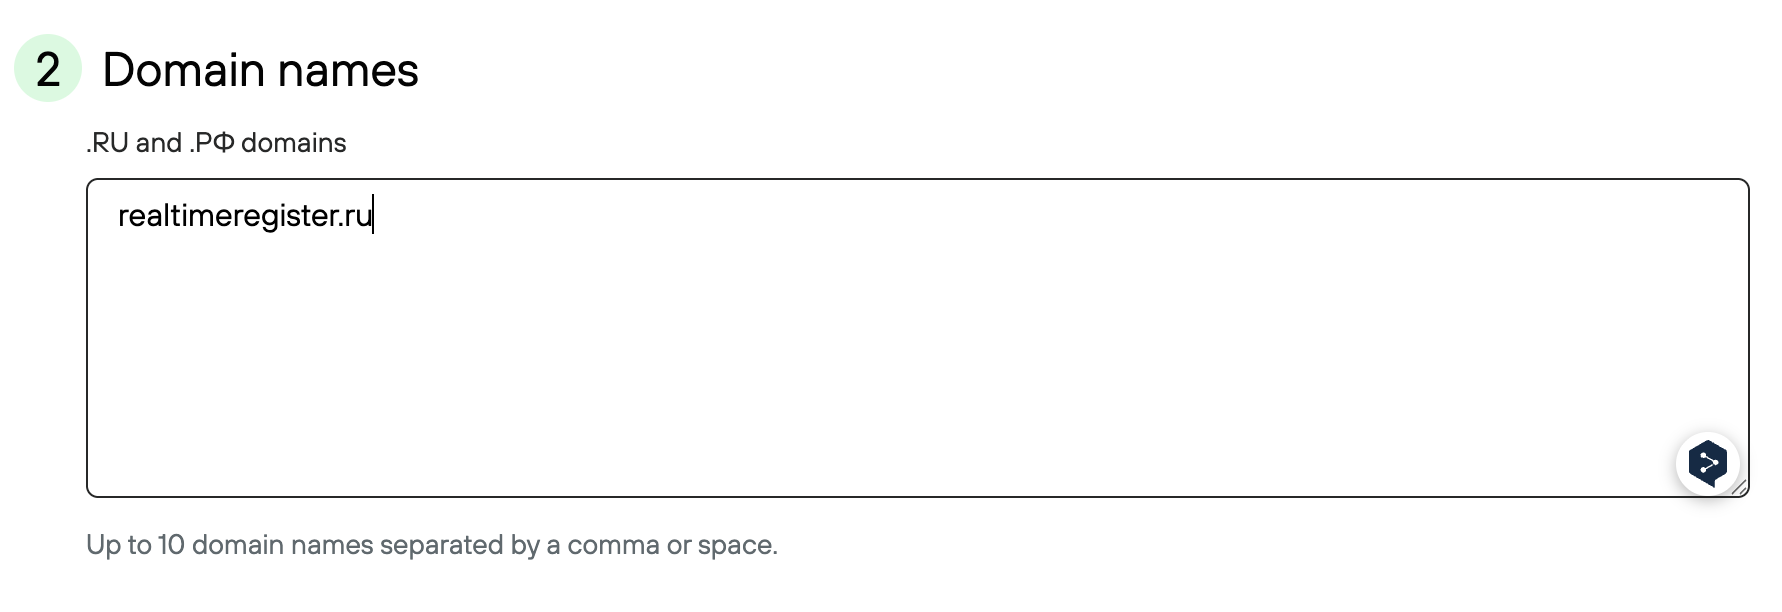
- Provide the domains you want to request an authcode for.
- Select the Receipt method to email and the authcodes will be sent to the registrant email address.
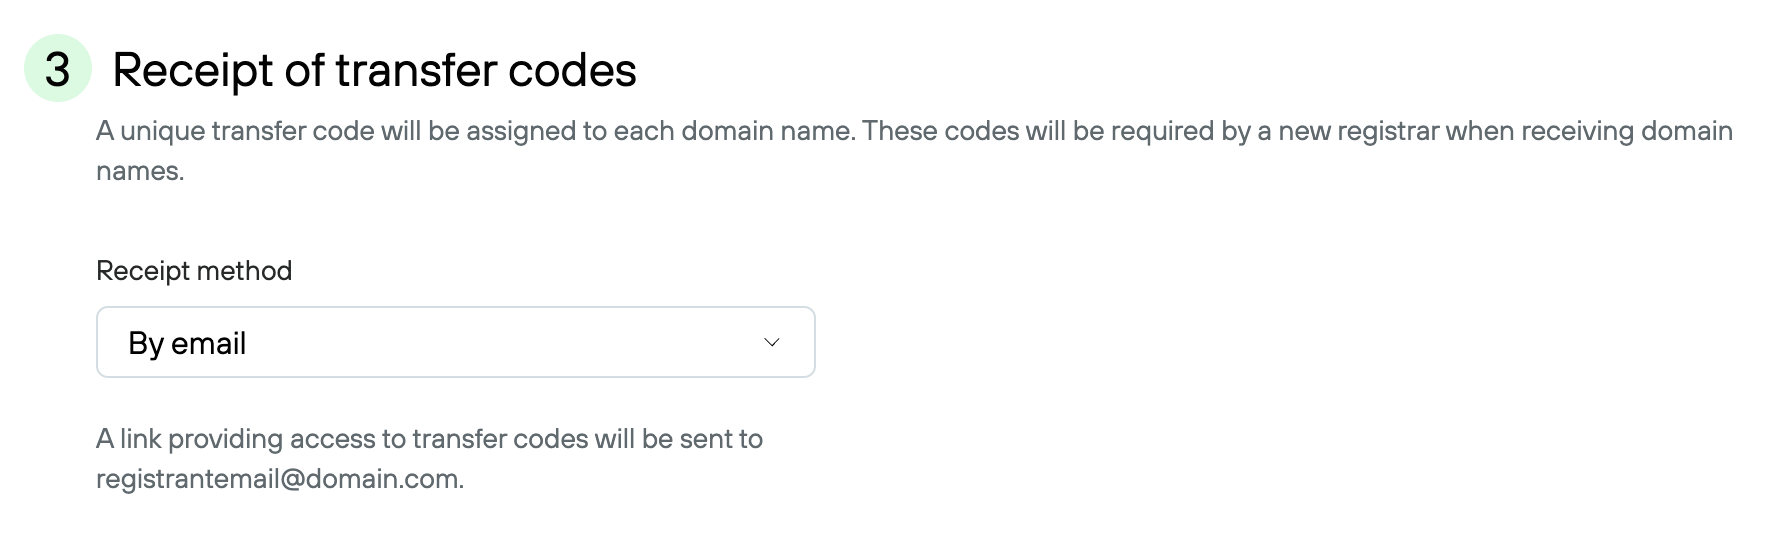
- Click continue to complete the authcode request.
- A message indicating the transfer was successful will be displayed.

- Have the registrant log in (https://www.nic.ru/en/auth/login/) to the NIC-D account.
- 2
- Once the authcode is received, it's valid for 20 days. Have the registrant contact their new registrar for more information on the gaining registrar incoming transfer process.
 If required, complete the


📤 Push transfer out to another NIC-D account with RU-Center
To push transfer out a .RU domain, have the registrant contact the new registrar/registrant for all information that's required to push the domain to a NIC-D account under their control.
.RU domains are prone to registry checks. ID documents or company registration documents may be requested by the registry at any given point in time to verify registrant identity.
‼️ Important
A push transfer to another RU-Center NIC-D account can only be done if the target NIC-D account has exactly the same registrant data in it as the current NIC-D account it is registered with.
- 1
-
Contact the new registrar/NIC-D account holder to receive all relevant information required to push the domain to the gaining registrar's/registrant's NIC-D account successfully.
⚠️ Typically, the receiving NIC-D account number + password is all you'll need from the new registrar/registrant to be able to push the domain successfully. Because we do not have insight on the processes at other registrars/registrant NIC-D accounts, it's advised to always get in touch with the gaining registrar/registrant before pushing a domain to another NIC-D account. - 2
-
Once you have received the NIC-D account number + password from the gaining registrar/registrant, have the registrant push the domain from the losing NIC-D account managed through Realtime Register to the receiving NIC-D account managed by the new registrar/registrant.
⚠️ Complete the below steps in the losing NIC-D account managed through Realtime Register. If you do not know losing registrant NIC-D account number, send an email to support@realtimeregister.com and request the losing NIC-D account number to be provided in a reply to your email.
- Have the registrant log in (https://www.nic.ru/en/auth/login/) to the NIC-D account that is managed through Realtime Register and currently manages the to be transferred domain.
- Click Operations → Domain transfer.
- Select the Account-to-account option.
- Enter the domain to be pushed to the receiving NIC-D account and click Continue.
- In the New registrant contact field, enter the receiving NIC-D account number you received from our support team.
- In the Administrative password field, enter the administrative password of the new NIC-D account.
- Click Transfer to execute the push to the receiving NIC-D account.
- A message indicating the transfer was successful will be displayed.
ℹ️ Errors might occur after confirming the push transfer. For more information, see ➤ Known errors.
- Have the registrant log in (https://www.nic.ru/en/auth/login/) to the NIC-D account that is managed through Realtime Register and currently manages the to be transferred domain.
- 3
- It can take up to 48 hours for the push to complete. Once completed, the domain will be visible in the receiving NIC-D account: https://www.nic.ru/en/manager/.
- 4
-
If a push transfer takes longer than 48 hours, have the receiving NIC-D account holder contact RU-Center through a support ticket and ask why the transfer has not been completed yet.
ℹ️ If RU-Center does not reply in a reasonable timeframe and the transfer still does not complete, the registrant can contact the gaining registrar/registrant for more information.
- 5
- If any additional steps are required after the push transfer has been completed at RU-Center, contact the gaining registrar/registrant for more information.
Known errors
📤 Transfer out Legacy .RU domains
You can recognise a legacy .RU domain in our portal by the TCI reference on the domain detail page as shown in the example below.

- 1
-
Make sure no server or client transfer prohibited status is active for the domain to be transferred.
- 2
-
Login to the portal and click the Generate authcode button on the domain detail page for the domain you wish to transfer out. This will send an authcode to the registrant email address.
⚠️ During most authcode requests for .RU, documents need to be provided to verify registrant identity. If documents are required, our support staff will contact you through email to request the required documents.
- 3
-
Once the authcode has been received, start the outgoing transfer by contacting the gaining registrar for information on their incoming transfer procedure.
ℹ️ Authcodes for legacy .RU domains are valid for a maximum of 20 days.
🚮 Delete
- To request a delete, follow the instructions in the ➤ Delete domain KB-article.
🪪 RU-Center Identity agreement process
The RU-Center identity agreement process needs to be completed before an authcode can be provided to the registrant email address or a trade can be performed. To complete the Identity agreement process, have the registrant log in to their NIC-D account and follow the steps below.
- 1
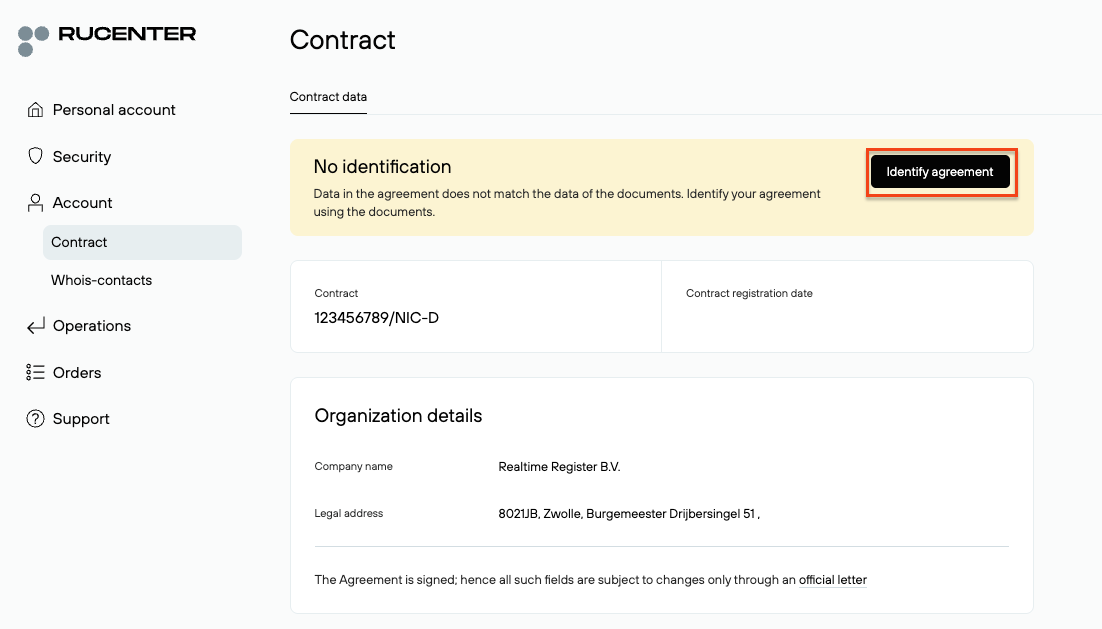
- Navigate to Account > Contract and click the Identity Agreement button.

- 2
-
Upload a valid Identity document that matches the legal form of the registrant. Explicit instructions are displayed on screen.
🪪 For natural persons, upload a valid and unredacted copy ID
🏢 For companies upload an officially recognised company registration certificate from the official company registration body of the country of origin of the company.

- 3
- A message indicating the document upload was successful will be displayed.

- 4
- The registrant will receive an email on the registrant email address with the results of the document upload. Once approved, the Identity agreement process is completed successfully.

🪪 ESIA identification (Gosuslugi)
⚠️ Important: Starting from 1 September 2026, registrants of .RU, .РФ and .SU domains must complete identification through the Russian Government Services Portal (Gosuslugi / ESIA). Without completed identification, domain management operations will be restricted.
🇷🇺 Currently, only Russian natural persons and Russian legal entities are able to complete verification through the Gosuslugi portal.
Without completed ESIA (Gosuslugi) identification, the registrant will be unable to register new domains, renew domains, change nameservers, or perform a registrant change. Once the domain reaches its expiry date, it may eventually become available for re-registration if ESIA (Gosuslugi) identification is not completed.
- Required for individuals, sole proprietors and legal entities.
- Applies to both new and existing registrants.
- Applies to .RU, .РФ and .SU domains.
At this time, no information is available regarding local contact or trustee services for .RU domains after 1 September 2026. Once information on trustee services becomes available, it will be published here and communicated through an informational email.
- 1
- Ensure that the registrant information associated with the domain is correct and up to date.
- 2
-
Have the registrant log in and complete identification through a verified Gosuslugi (ESIA) account.
⚠️ Complete the steps below only if the NIC-D account contains the correct and up-to-date registrant information.
- Have the registrant log in (https://www.nic.ru/en/auth/login/) to the NIC-D account that needs to complete the identification procedure through the Gosuslugi portal.
- Click Account → Contract → Identify Agreement.
- Click the Go to Gosuslugi option.
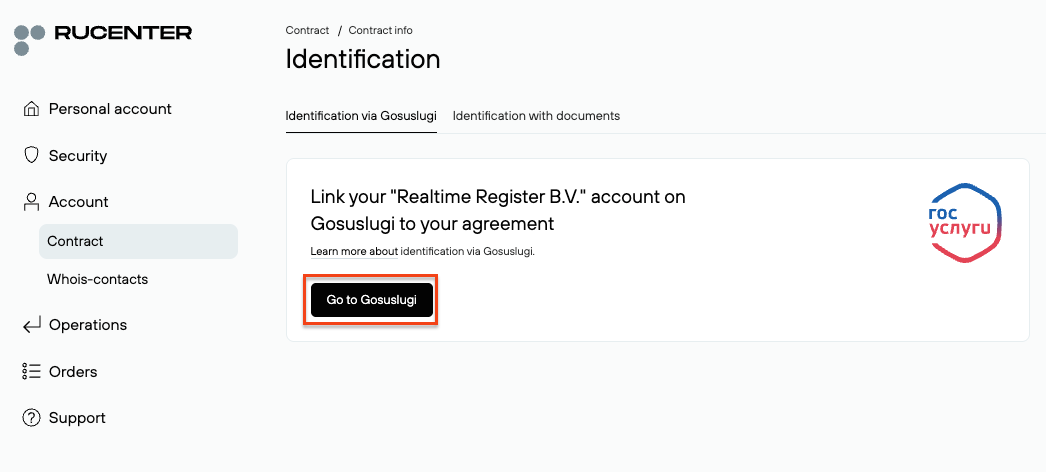
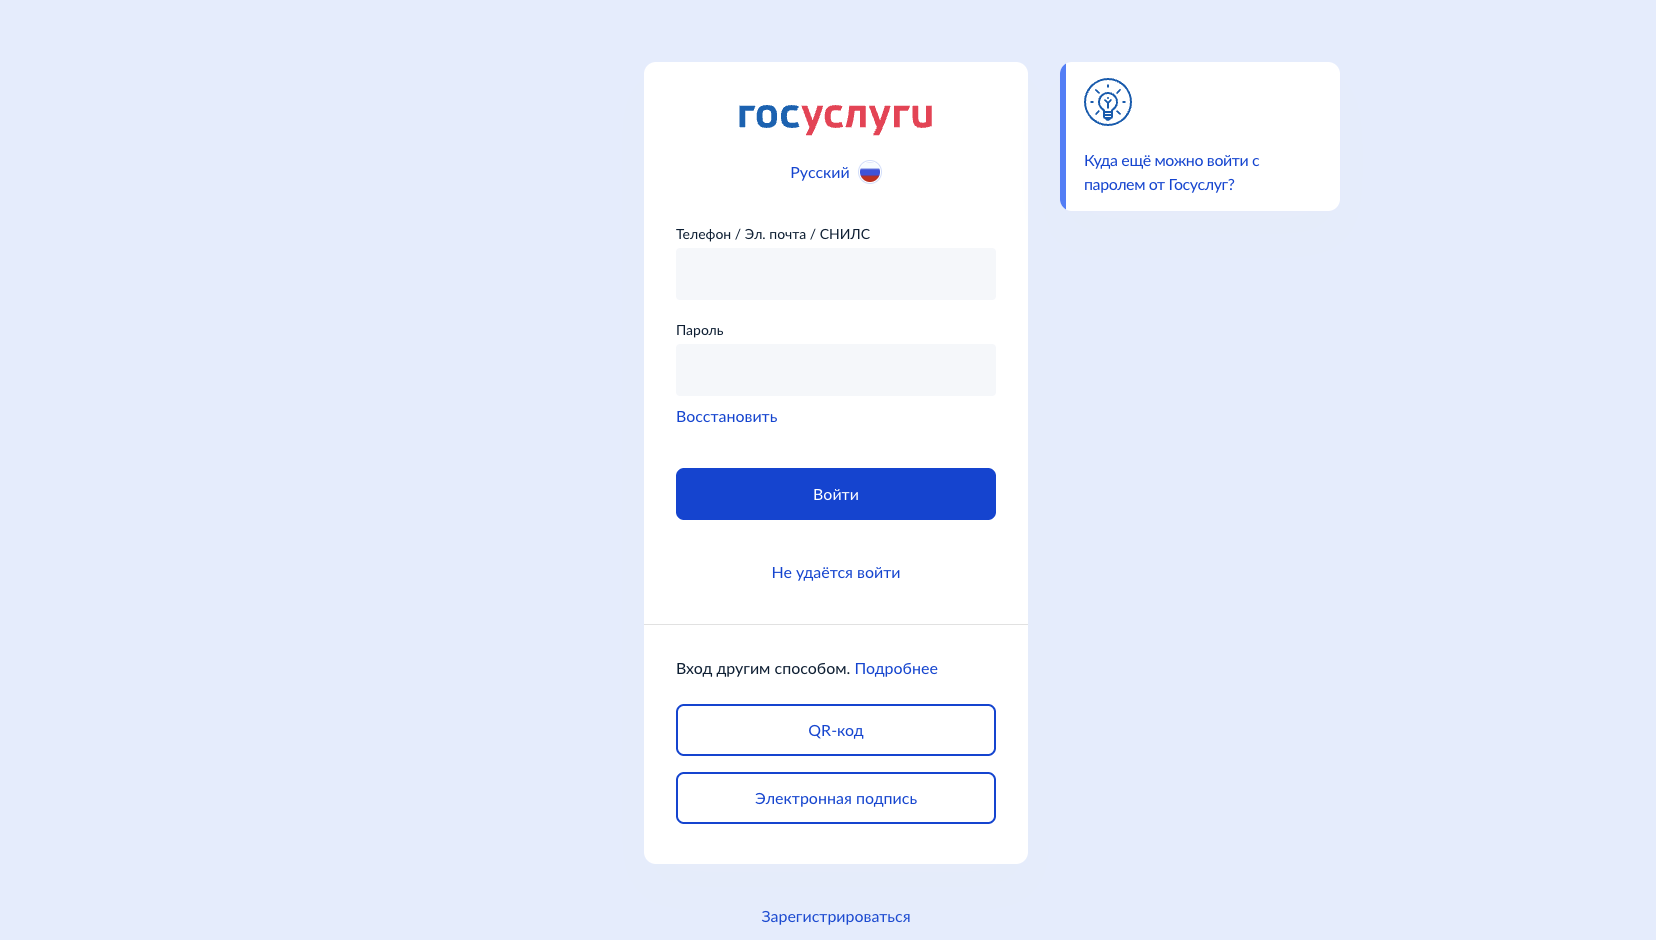
- Have the registrant log in with their Gosuslugi account and complete verification. If the registrant does not yet have a Gosuslugi account, one can be created by following the instructions provided on the Gosuslugi portal.
- Have the registrant log in (https://www.nic.ru/en/auth/login/) to the NIC-D account that needs to complete the identification procedure through the Gosuslugi portal.


- 3
-
If the registrant runs into any issues completing verification, have the registrant create a support ticket directly to RuCenter from the support section whilst logged into their NIC-D account. A support ticket can be created through the Support option in the left hand menu whilst logged in to any NIC-D account.
ℹ️ If RU-Center does not reply in a reasonable timeframe our reseller can contact support@realtimeregister.com for more information.
⚙️ Contact properties
To add contact properties for .RU (RUcenter) to a contact, follow the instructions in the ➤ Contact properties KB-article and follow the instructions up until step #2. Once you select the .RU (RUcenter) contact properties option, the fields below appear.

- 1
-
ID number (IDnumber): Only required for natural persons, passport number
Use a valid document. Registry may request a copy when they see fit.
- 2
-
Date of birth (birthDate): Format DD-MM-YYYY.
- Provide the date of birth of the registrant.
- 3
-
Taxpayer identification number (tasIdNumber): Only required for organisations
- Provide the taxpayer identification number belonging to the registrant company.
- 4
- Click “Save properties” to confirm adding properties to the contact.