Transfer domain(s)
Log in to the Realtime Register portal and open the Domain check.
To transfer domains into your Realtime Register account, follow the steps below.
- 1
- Check availability for the domains you want to transfer using the ADAC or list availability check. For a detailed description on where to find the Domain check and how to use it, See the ➤ Check KB-article.
- 2
- Add the domain(s) you want to transfer to your cart and click Proceed to checkout.

- 3
- Provide all required information in the domain transfer form. The available options are explained in the following steps.
⚠️ Important
Registration profile
A registration profile can be used to automatically fill most fields in the domain transfer form, significantly speeding up the transfer process. A registration profile contains default registration information, including:
- Registrant, Admin, Billing, and Tech contacts
- Domain autorenewal settings
- Nameserver configuration
- DNSSEC key data
- Preferred FOA contact
To use a registration profile, you must create one first. For a detailed description on creating registration profiles, See the ➤ Create registration profiles for domain creates/transfers KB-article.
- 4
-
If you want to use a registration profile, select it from the dropdown menu. The form will be pre-filled automatically. Add any additional information if required. If you do not want to use a registration profile, you can skip this step.
ℹ️ If you use a registration profile, you can skip the steps below that are auto-filled by the selected registration profile.

- 5
- Provide the Registrant, Admin, Billing, and Tech contact details.

- 6
- Configure the domain autorenewal and Privacy Protect settings.

- 7
-
Configure the nameserver settings for the domain(s) to be transferred.
ℹ️ You can choose one of the following options:
🚀 Premium DNS zone
- Select the DNS zone option and choose the Premium DNS zone option. Existing Premium DNS zones will be auto-selected if available.
- Select whether to use Vanity nameservers or not.
⚠️ If you do not have preconfigured Vanity nameservers, select not to use Vanity nameservers. For details on Vanity nameservers and setup instructions, See the ➤ Setup vanity nameservers for Premium DNS zones KB-article. - If no preconfigured Premium DNS zone exists, create a new Premium DNS zone using a DNS template or a master server in the order form.
⚠️ When using the template option, select whether to link the newly created Premium DNS zone to the template. If linked, the zone remains in sync with the template when the template is updated.
ℹ️ If required, you can create a Premium DNS zone outside the order form. For instructions, see the ➤ Create a Premium DNS zone KB-article. After creation, click Check for existing zones to load the zone into the order form. - Select whether DNSSEC should be signed automatically upon zone creation.
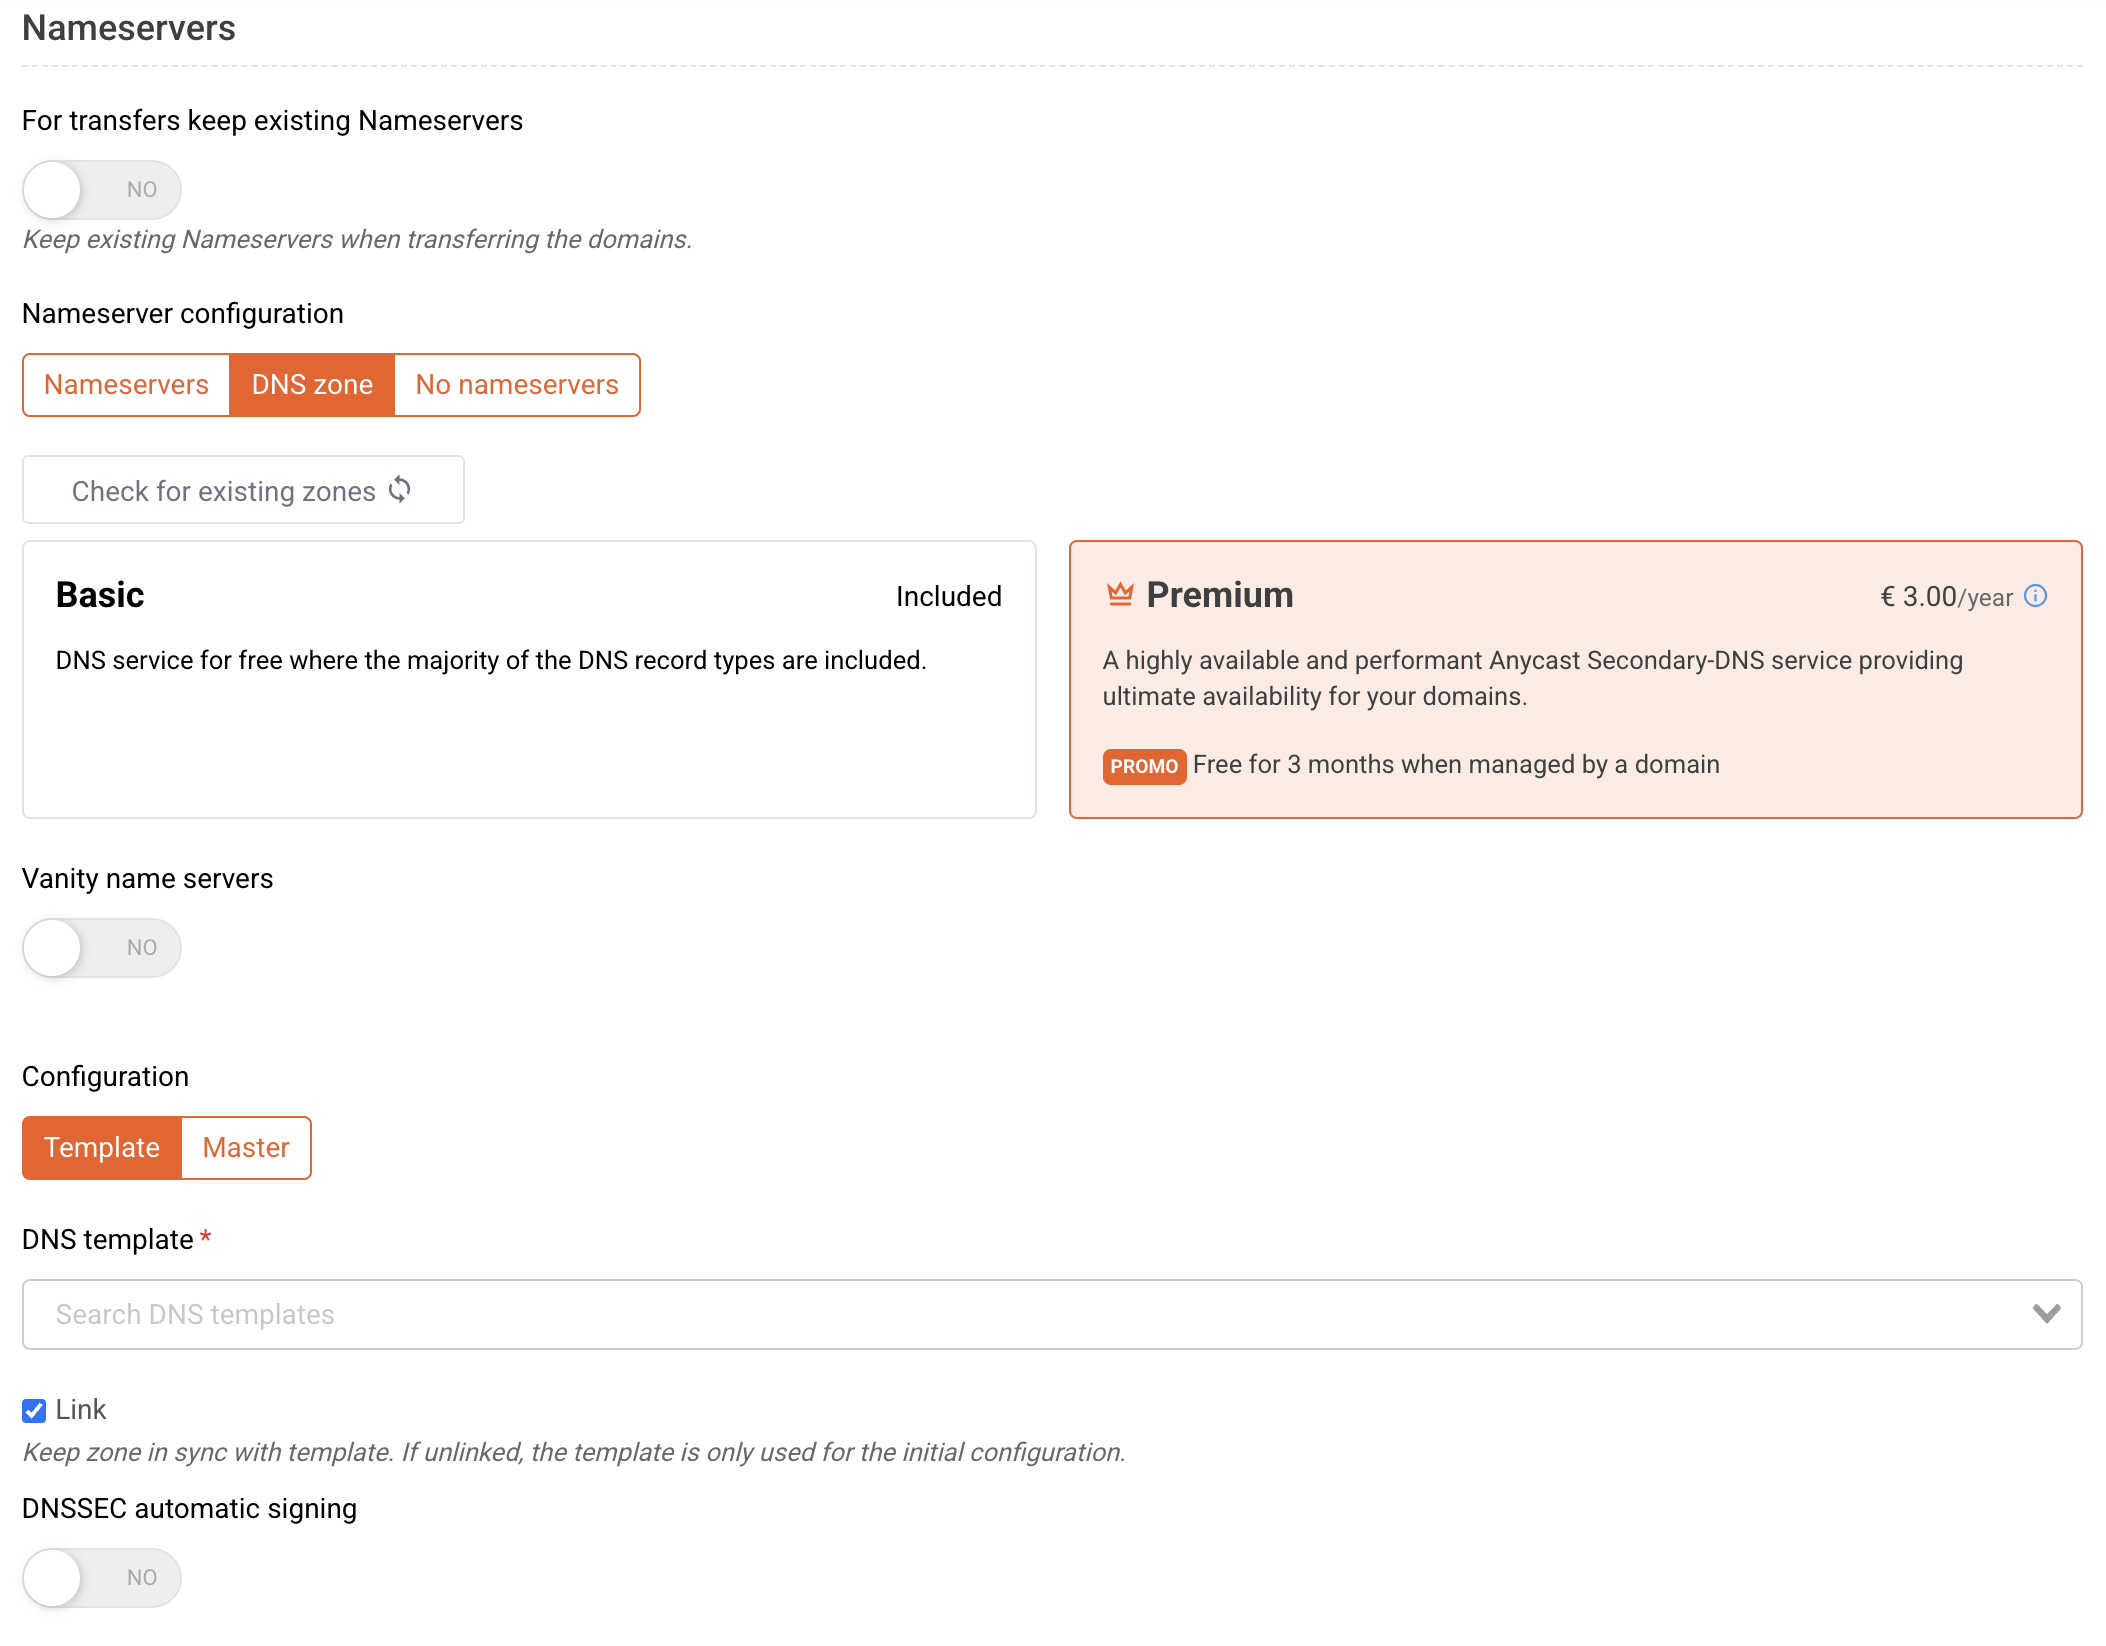
🧩 Basic DNS zone
- Select the DNS zone option and choose the Basic DNS zone option. Existing Basic DNS zones will be auto-selected if available.
- Create a new Basic DNS zone using a DNS template in the order form.
- Select whether the DNS template should remain linked.
ℹ️ If required, you can create a Basic DNS zone outside the order form. For instructions, See the ➤ Create a Basic DNS zone KB-article. Once the zone has been created, click Check for existing zones to load the zone into the order form.

🌐 External nameservers and DNSSEC key data
- Select the Nameservers option.
- Add the external nameservers.
- Add DNSSEC key data if required.
⚠️ Add DNSSEC key data only if you want to set DNSSEC during the transfer request. DNSSEC must be configured on the nameserver side before requesting the transfer.

🚫 No nameservers
- Select the No nameservers option.
ℹ️ Use this option if you want to submit the transfer request without setting nameservers during the transfer.

🔒 Keep existing nameservers
- Enable the option to keep existing nameservers.
- Enable the option to keep existing DNSSEC records if required.
ℹ️ Use this option if the domain already has active nameservers (and optionally DNSSEC) that must remain unchanged during the transfer.

- 8
- Select the preferred FOA contact and choose whether to act as the designated agent during the transfer.
⚠️ Important
The FOA contact preference and designated agent option are only available if supported for the requested transfer. If these options are not shown, this step can be skipped.

- 9
- Click Confirm to proceed to the order confirmation page.

- 10
- Select the transfer period if available, provide the authorization code if required, and click Complete order.

- 11
- A confirmation message will indicate whether the transfer was completed immediately or is pending.

- 12
- If the transfer is pending, you can track the transfer status on the Requested transfers overview in the portal.

- 13
- For more information on managing suspended transfers, See the ➤ Check pending transfers KB-article.