Create a Basic DNS-zone
Login to the portal and go to DNS > New zone
To create a Basic DNS-zone in your Realtime Register account, follow the instruction below.
- 1
- To create a new Basic DNS-zone, click Basic DNS


- 2
- Submit the domain your creating the DNS-zone for and select whether to use a pre-filled DNS-template or submit records one by one to create the Basic DNS zone
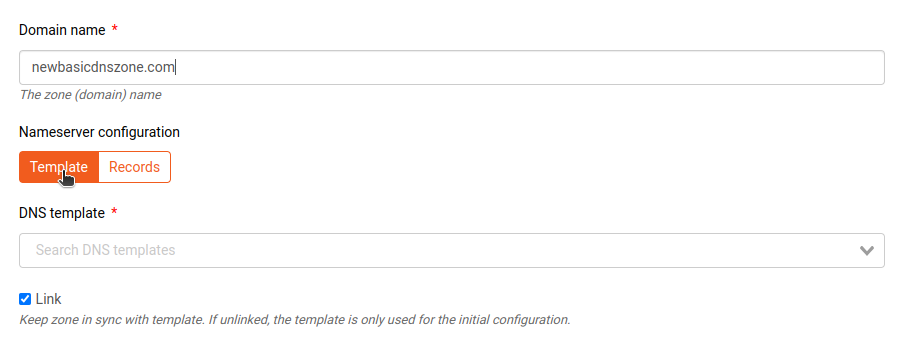
Template option
Select a DNS-template to use that fills the DNS-zone with it's contents

Records option
Define the SOA-record and add DNS-records as required by clicking + Add record and select and configure the DNS-records manually. For instructions on how to configure the SOA-record and format DNS-records in our portal in order to add them to the zone, click on any of the corresponding records in the table below the image to navigate to the KB-article with specific instructions per SOA/DNS-record

| Customize SOA-record | Instructions on customizing the SOA-record
|
| Add an A-record | Instructions on adding an A-record
|
| Add an MX-record
|
Instructions on adding an MX-record
|
| Add a CNAME-record
|
Instructions on adding a CNAME-record |
| Add an AAA-record
|
Instructions on adding an AAA-record |
| Add a URL-record | Instructions on adding an URL-record
|
| Add a MBOXFW-record
|
Instructions on adding an MBOXFW record
|
| Add an HINFO-record
|
Instructions on adding an HINFO-record |
| Add a NAPTR-record
|
Instructions on adding an NAPTR-record |
| Add an NS-record
|
Instructions on adding an NS-record |
| Add an SRV-record
|
Instructions on adding an SRV-record |
| Add a CAA-record
|
Instructions on adding an CAA-record |
| Add a TLSA-record
|
Instructions on adding a TLSA-record |
| Add a TXT-record
|
Instructions on adding a TXT-record |
| Add an ALIAS-record
|
Instructions on adding an ALIAS record |
| Add a DNSKEY-record
|
Instructions on adding a DNSKEY-record |
| Add a CERT-record
|
Instructions on adding a CERT-record |
| Add a DS-record
|
Instructions on adding an DS-record |
| Add a LOC-record
|
Instructions on adding a LOC-record |
| Add a SSHFP-record
|
Instructions on adding a SSHFP-record |
| Add an URI-record
|
Instructions on adding an URI-record |
- 3
- Once you've configured the zone as required, click Complete to create the Basic DNS-zone


Important
Once created, a Basic DNS-zone is not published in the DNS until it is managed by a domain that is registered through Realtime Register. A message is displayed on the the Basic DNS-zone overview page that indicates that the zone is not managed by a domain wnd is not published in the DNS;

To activate the Basic DNS zone in DNS, update a domain in your Realtime Register account to the DNS-zone. For more information on how to update a domain to a Basic DNS zone, go to the Update domain(s) knowledge base article.