Customize your account's branding contact details
The third step is to customize your account's default brand with an email address connected to your company. Updating your account's default brand is necessary to show your company data in all the branded emails sent to your customers as well as showing your company data on all the branded web pages that are available in your account. For adding multiple brands once your default brand has been set up, check the Branding knowledge base article.
To change your default brand contact details, follow the instruction below.
Login to the Domain Manager and go to Account > Branding and open your default brand.
Take note: It's an obligation to setup a branded email address through which customers can reach you. This email address will be shown when our system sends out notifications to your customers regarding domains you manage for them.
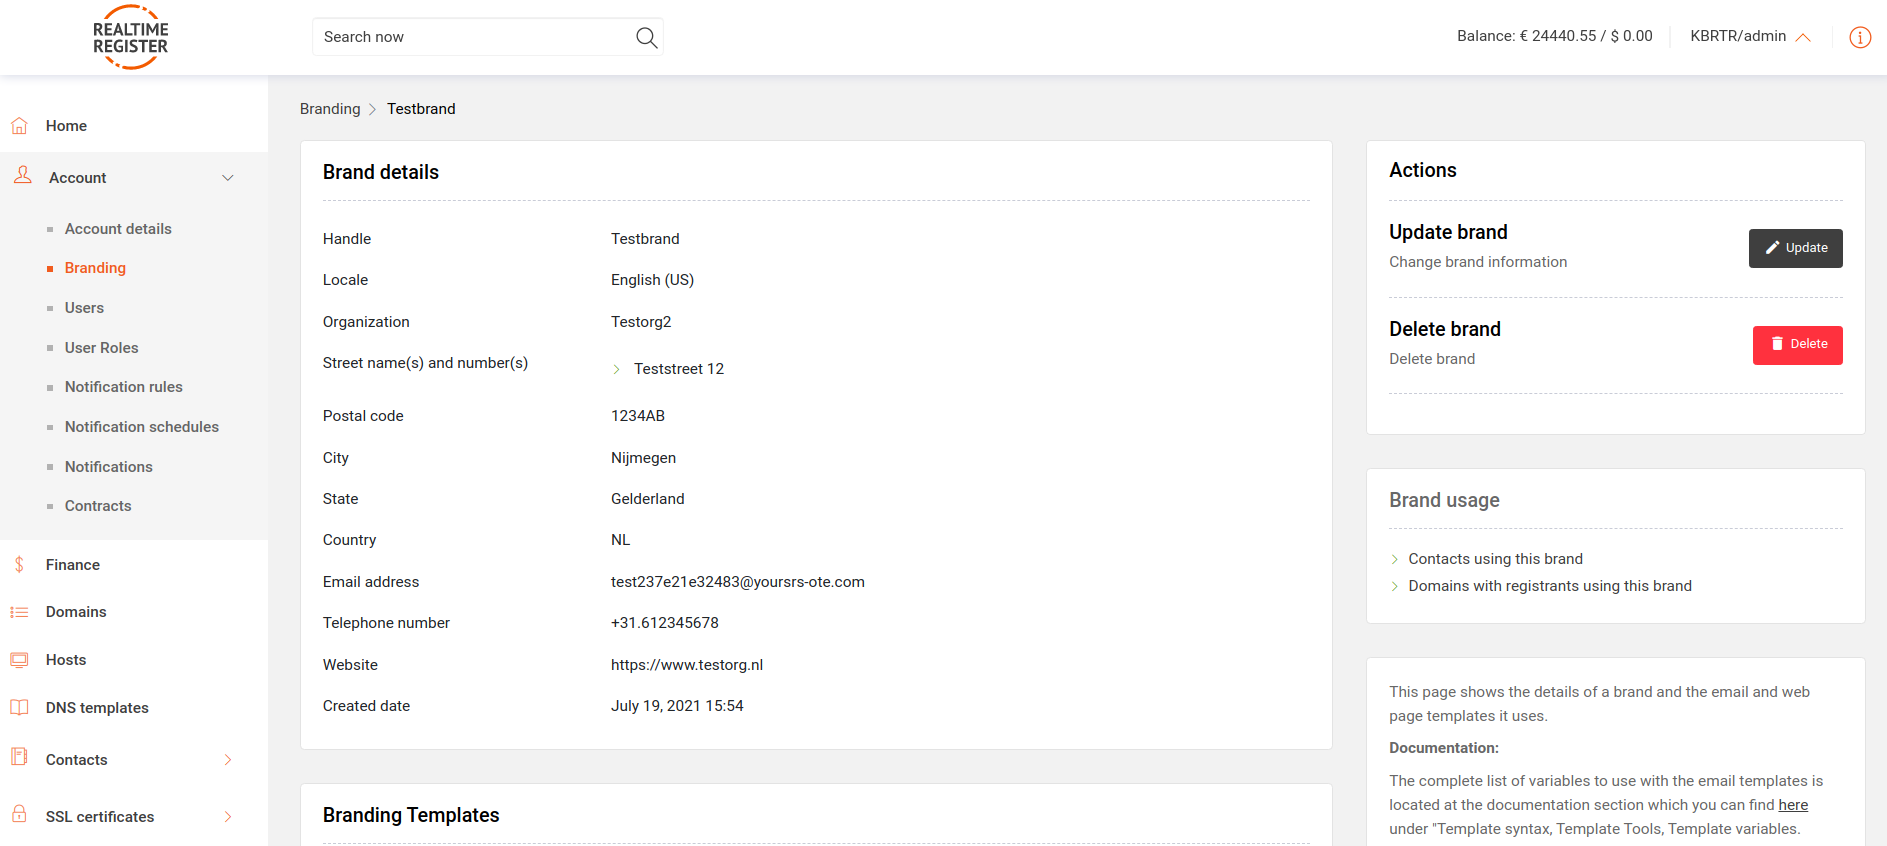
- Once logged in, your default brand will show as shown on the page below. The first thing you will have to do is set up a custom email address from which branded emails are sent. Click 'Update brand' to customize your default brand.

- Once you have opened the brand configuration page, you will be able to update your brand's contact details and email address. Do keep in mind that an SPF-record has to be added to the domain the email address is connected to. The information that has to be added to a new or existing SPF-record is "include:spf.mydomainprovider.com". If there is no SPF record with this information available an error message will come up.

- Once the SPF-record is added and the update requested successfully, request the update and a brand update will be shown pending. If necessary, you can resend the confirmation email to confirm the brand update by clicking 'Resend'.

- The email you'll receive on the brand's new email address looks like the email shown below.
Take note: The brand confirmation email is sent to the email address you setup as your brand contact email address.

- Once you've clicked the link in the email above, you'll be directed to the page below where you can accept the brand update. Approve the brand update and declare you're authorized to do so.

- When you now check your brand details, you'll notice the blue bar has disappeared that allows you to resend the confirmation email and the brand details have been updated.
- You've now successfully changed your default brand's email address.